
Quickly Issue a Sales Tally Receipt and Collect Payment
Want to customize the receipt style / add a logo / add a payment QR code?
This article covers how to issue a sales order. If you want to design your own company's tally receipt style (add a logo / bank account / WeChat payment QR / Alipay payment QR), see Designing the Sales Tally Receipt Template & Configuring Payment Info — get a professional receipt set up in 5 steps.
Overview
This guide helps fabric merchants quickly complete day-to-day sales operations, and is especially well suited to secondary wholesalers and spot traders. For a complete overview of Inventory & Sales features, see Inventory & Sales in Detail.
Step-by-Step
Step 1: Open the Sales Module
Click "Sales" in the left-hand menu to view the full list of sales orders. The list supports multi-dimensional filtering and search by date, customer, owner, creator, product, color, type, and more. Click the "New Sales Order" button in the top-right to open the creation page.
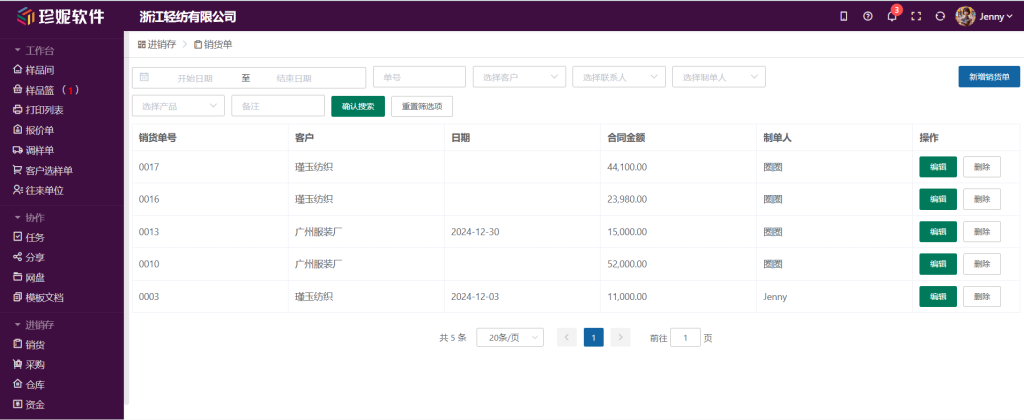
Step 2: Confirm the Product Is Set Up
Inventory & Sales is built on the concept of spot stock. You first need to set the fabric's attribute to "Product" on the sample room page before it can be used in a sales order.
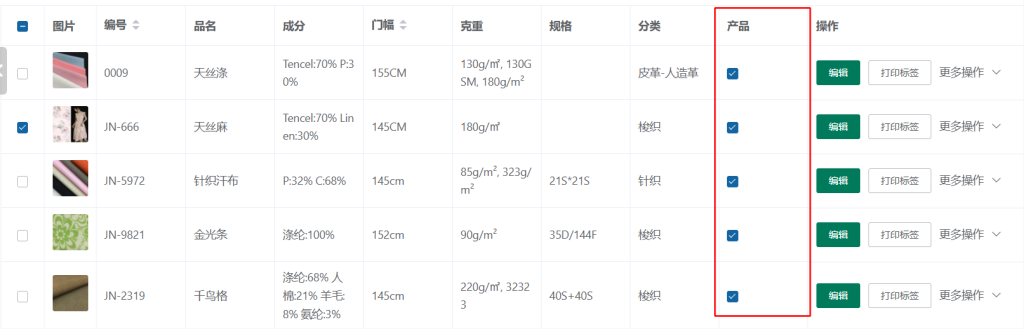
Step 3: Fill Out the Sales Order
- Fill in the header — the sales order number is generated automatically (format XS + date + sequence); customer is required; select the owner and type.
- Select products — click "Add Product" and check the fabric products you need.
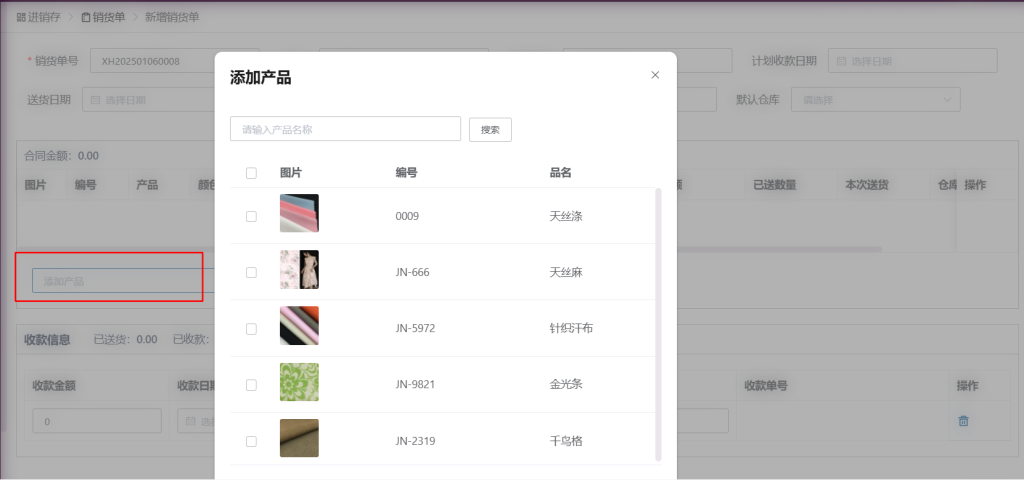
- Enter piece-level measures — two ways:
- Enter the meters directly (suitable when stock has not been purchased in advance).
- Check the existing piece-level measures of products already in stock.
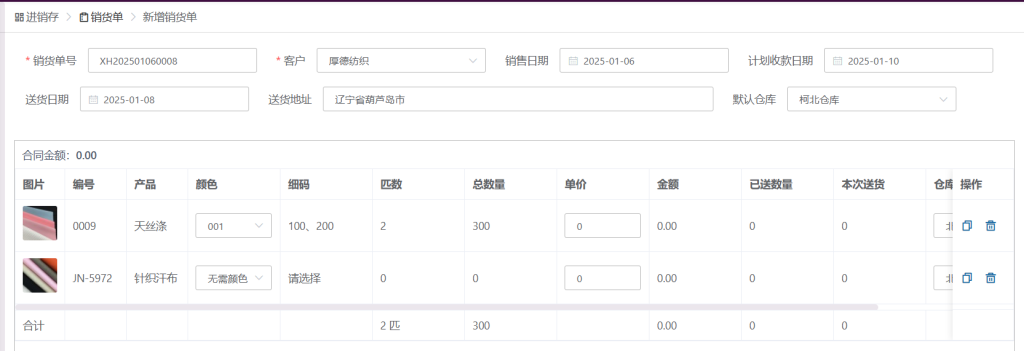
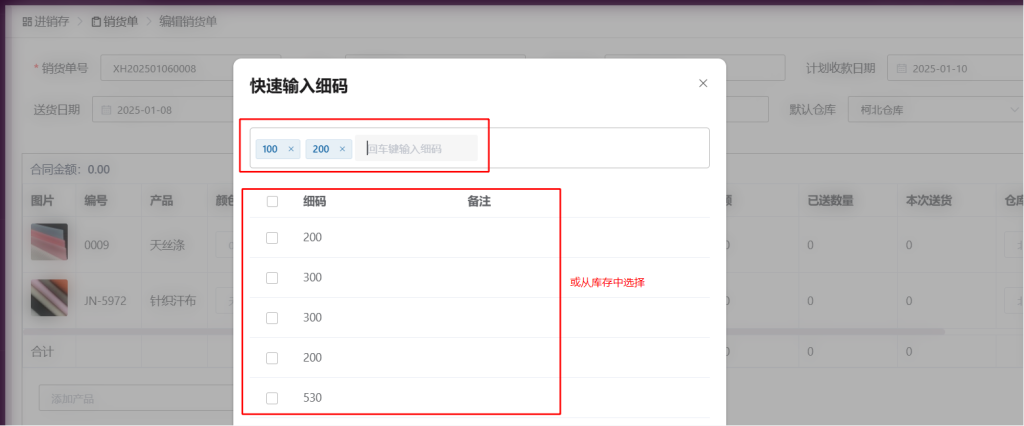
- Record the delivery — enter the quantity already shipped in the "This Delivery" field.
- Enter the payment — in the payment area, enter the amount received, select the receipt date and account, and the system automatically calculates the outstanding balance.
Step 4: Receipt Management
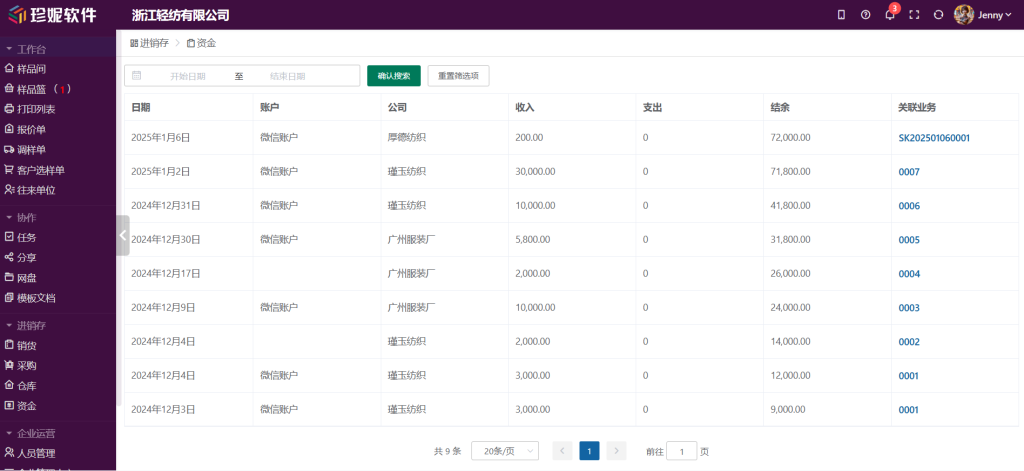
Jenny Software lets you enter payment info and reconcile it automatically right from the sales order screen—no need to jump to the Funds module.
- Each receipt automatically generates a receipt number (format SK + date + sequence).
- Receipt records are linked to the corresponding sales order.
- The system updates the payment status in real time (unpaid → partially paid → paid).

All receipt records can be viewed and reconciled together in the "Funds" module:
Step 5: Print and Send
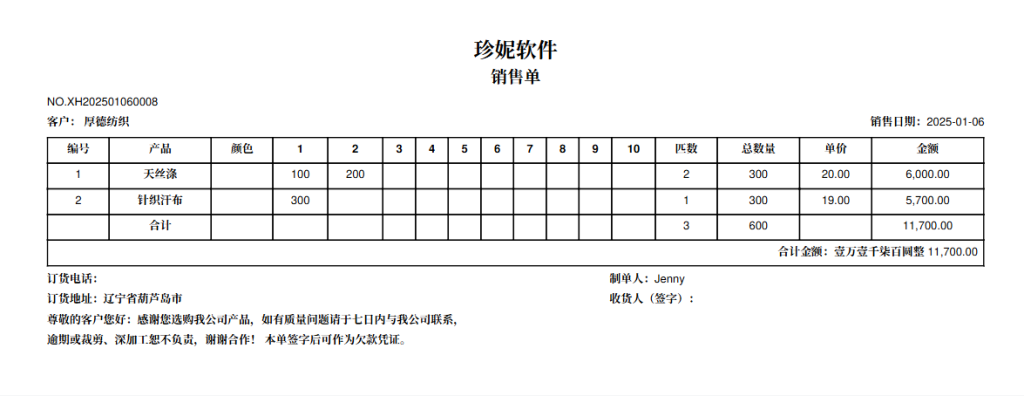
Click the "Save and Print" button to generate a sales order in fabric tally receipt format that you can send directly to the customer. Printing uses the default template configured in the Document Editor; you can customize the template's fields, layout, and style.
Handy Tips
- Recommended unit price: if a product has a transaction history, the system automatically recommends the last unit price used.
- Negative-stock orders: when stock is insufficient, you can still issue an order against negative stock, then offset it later by replenishing through a purchase.
- Report for picking: if you need warehouse staff to pick the goods, click "Report" on the sales order, and the picker will handle it in the "Picking" module.
- Scan-to-stock-out: use the Jenny app to scan the QR code on the fabric label to auto-fill piece-level measures.
- Redacted stock-out view + shareable link: a sales order can generate a stock-out view for warehouse keepers / workers (hiding sensitive info like unit prices and amounts), and you can create a shareable link so they can see what to ship without logging in.
Related Articles
- Jenny Order Pad (Storefront Tablet App) — Issue sales orders quickly on an Android tablet, right in front of the customer at the storefront
- Inventory & Sales in Detail — The complete guide to sales, picking, and stock in/out